Introduction

This guide will provide detailed step-by-step instructions on replacing the shells covering the buttons for the GameSir K1 Kaleid wired controller. The A, B, X, and Y buttons are used to confirm choices or move within a game. They can become sticky, unresponsive, or physically damaged due to overuse, dirt, or accidental damage.

  1. UeiJqBUkoFuB4UWt
    • Remove seven 1 mm screws from the backside of the controller using a TR6 Torx screwdriver.

    • There may be a screw covered under the manufacturer's sticker.

  2. RHhE4Mg6cBkrGyEI
    RHhE4Mg6cBkrGyEI
    VaXV4ErHEadwOsVE
    OGOYLuVcHyt6ZO5r
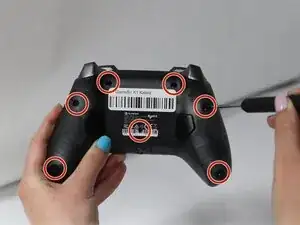
    • Hold the controller between your hands, with the front panel facing down.

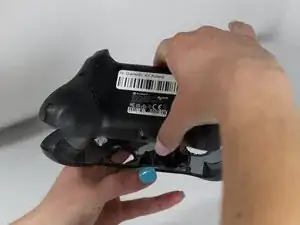
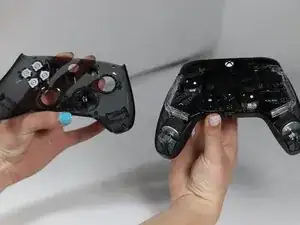
    • Lift the back panel.

    • It should come up easily. If met with resistance, check for a missed screw on the back panel.

  3. BeiLOTy2dvfOYmgh
    BeiLOTy2dvfOYmgh
    ImrREpkAwR3EtJEQ
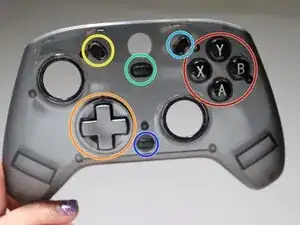
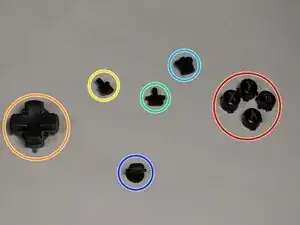
    • Replace needed buttons.

    • Order matters: the buttons have different notches. Going clockwise: Y is at the top, B is to the right, A is bottom, and X is left.

    • A, B, X, Y Buttons.

    • The D-pad

    • The view button

    • The share button

    • The menu button

    • The M button

Conclusion

To reassemble your device, follow these instructions in reverse order.

Triniti Gutierrez

Member since: 24/01/25

878 Reputation

0 comments